The SSL protocol – is a reliable way to protect information on the internet for websites and online transactions. Using this level of protection guarantees the loyalty of your customers and authority with search engines, and also noticeably improves your company's reputation.
HTTPS – is a secure version of the HTTP protocol that provides full encryption of data when transferring files and personal data to the server through a website. Protection is achieved by encoding the information; subsequent decryption on the recipient's side is possible using a special unique key. To implement secure transfer for your website, you need to install an SSL certificate on your dedicated server.
An SSL certificate is a digital signature; by purchasing it, the owner agrees to use the protocol to protect users' data.
Installing an SSL certificate (step-by-step guide)
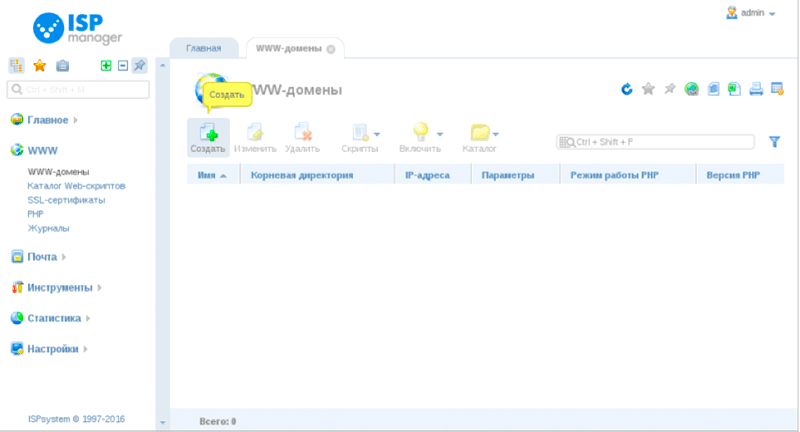
The method of installing a certificate via the control panel depends on the ISPManager version; we will use ISPManager 5 as an example. First you need to log in to the panel as the root user, who has maximum rights. In the Accounts – Users subsection, enter the required account so that the user in the upper right corner changes to the one you need.
This is necessary so that you have access to the SSL certificates section under WWW, through which all the configuration is done.
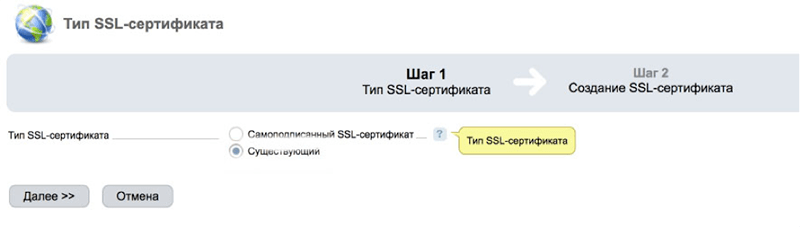
Select «SSL certificate type» – Existing
After purchasing the certificate, you should have three important files available, which we will work with next.
Fill in the fields one by one: «Username» – arbitrary (preferably similar to the name of the company or the domain for which the certificate was purchased);
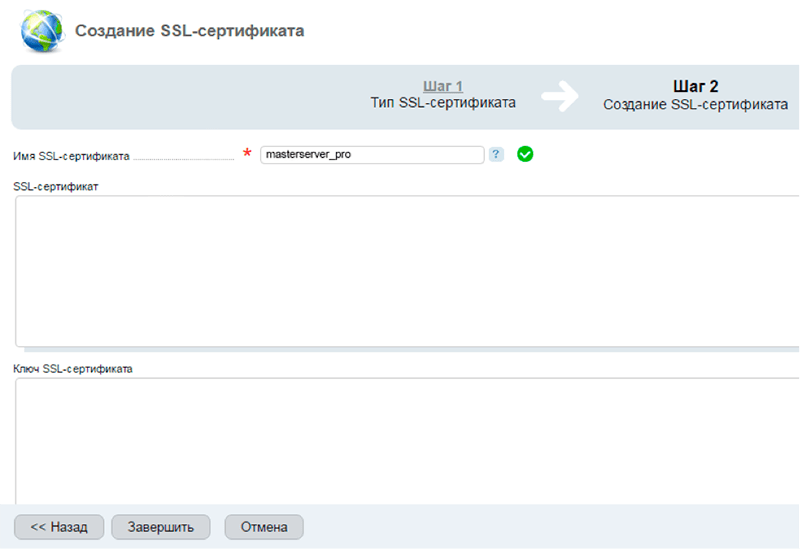
«SSL certificate name» - specify a name based on the domain name; a checkmark will appear on the right, indicating that the input is correct.
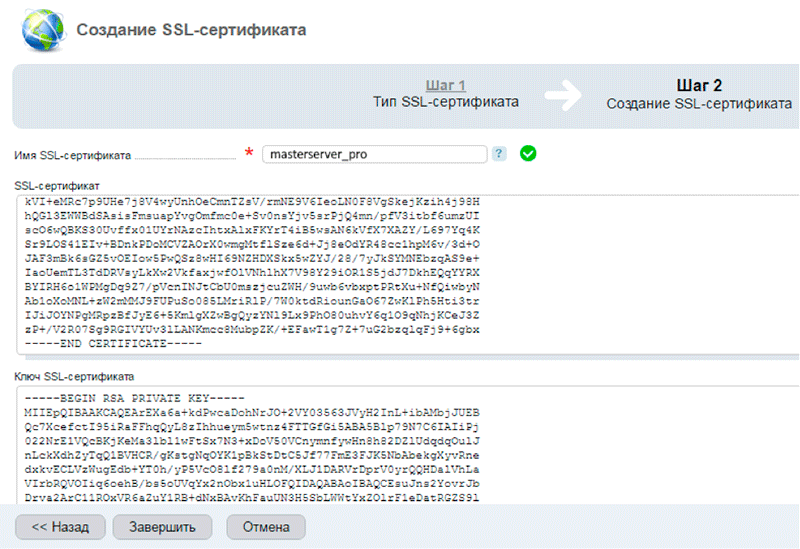
In the next step, enter the contents of the .crt file into the «SSL certificate» field. Copy all the content from BEGIN CERTIFICATE to the end, opening the corresponding file with NotePad or WordPad. In the same way, fill in the «SSL certificate key» and «SSL certificate chain» fields from the .key and .ca-bundle files respectively. When finished, click the Finish button.
To activate the certificate, go to WWW domains and double-click the appropriate domain.
Then check the Secure connection (SSL) box, and make sure the boxes Redirect HTTP requests to HTTPS (the system redirects the user to the secure domain, protecting their data) and Enhanced SSL security are checked. The default port is 443.
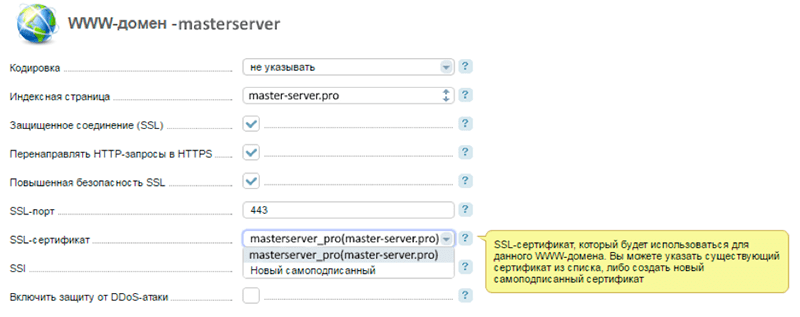
After completing the settings, a new SSL icon appears in the domain's Parameters. And in the SSL certificates section, an icon will also appear next to the corresponding certificate, indicating that the installation has completed successfully.
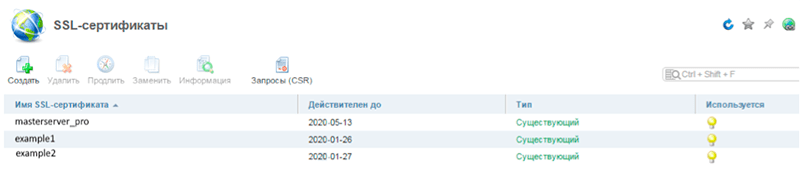
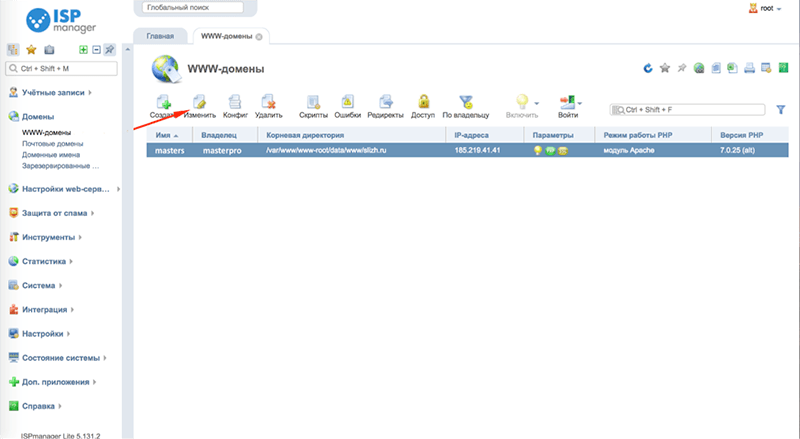
After restarting the server, you can check that the site works directly in the browser. Usually, with an https connection, a green padlock appears next to the site address, indicating that information is being transmitted over a secure protocol.
Purchasing an SSL certificate + free setup
With us you can purchase SSL certificates at minimal prices from $6, and our admins will install and configure it on your server free of charge. To make a purchase, contact our support team.
Attention! The sale and setup of certificates is only available for servers rented from us.